
When a new school is assigned to you, usually within the first day, you create its School and Program in the platform. Getting a school to launch also involves a kick-off call, a pre-launch meeting, and schedule and reminder emails with the school - but all of that happens outside the platform, so it isn’t covered here.
Go to Schools in the main nav, then click + New School at the top right to open the Create New School modal.
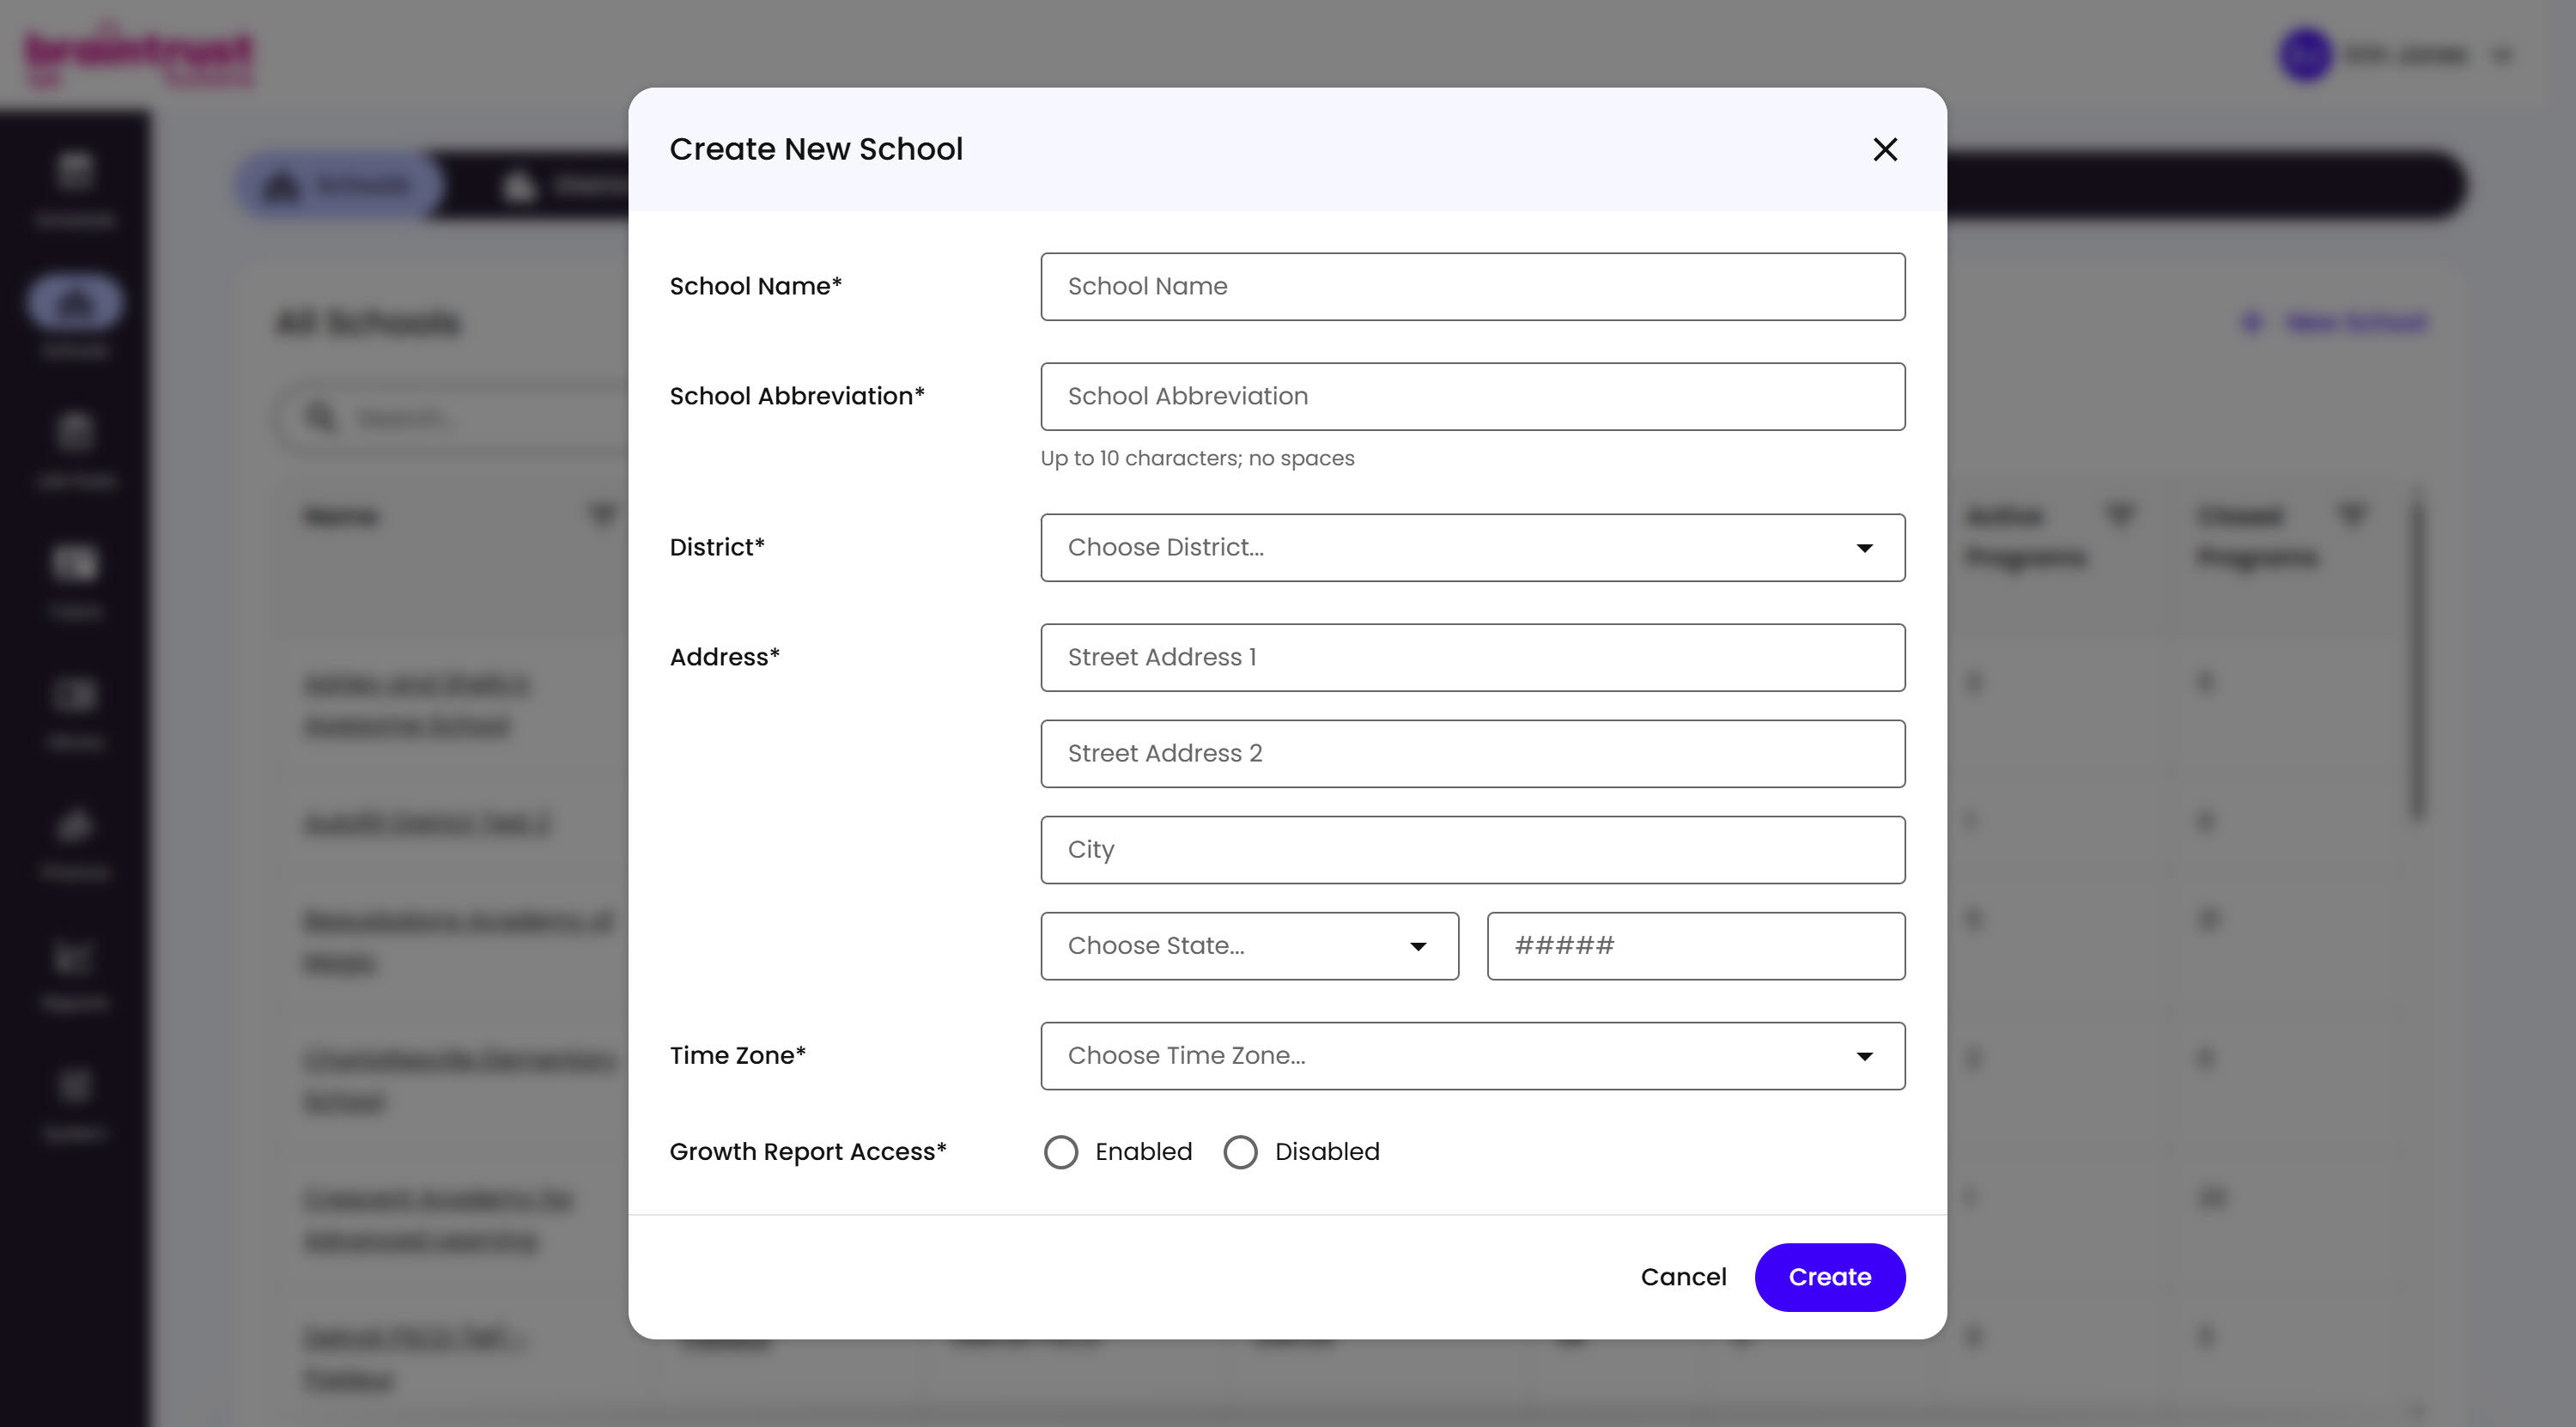
What’s on This Screen
- School Name, the school’s full name.
- School Abbreviation, up to 10 characters, no spaces.
- District, a required dropdown - see below for adding one that doesn’t exist yet.
- Address, Street Address 1 and 2, City, State, and ZIP.
- Time Zone, the school’s own time zone.
- Growth Report Access, Enabled or Disabled. Growth Reports don’t show up by default - this is what turns them on for the school.
- Cancel and Create buttons, to back out or confirm.
Pick an existing District from the dropdown, or if the school’s district doesn’t exist yet, scroll to the bottom of the list for + Add new…, which opens the Create New School District modal right over the first one, so you don’t have to cancel out and lose what you’ve already entered.
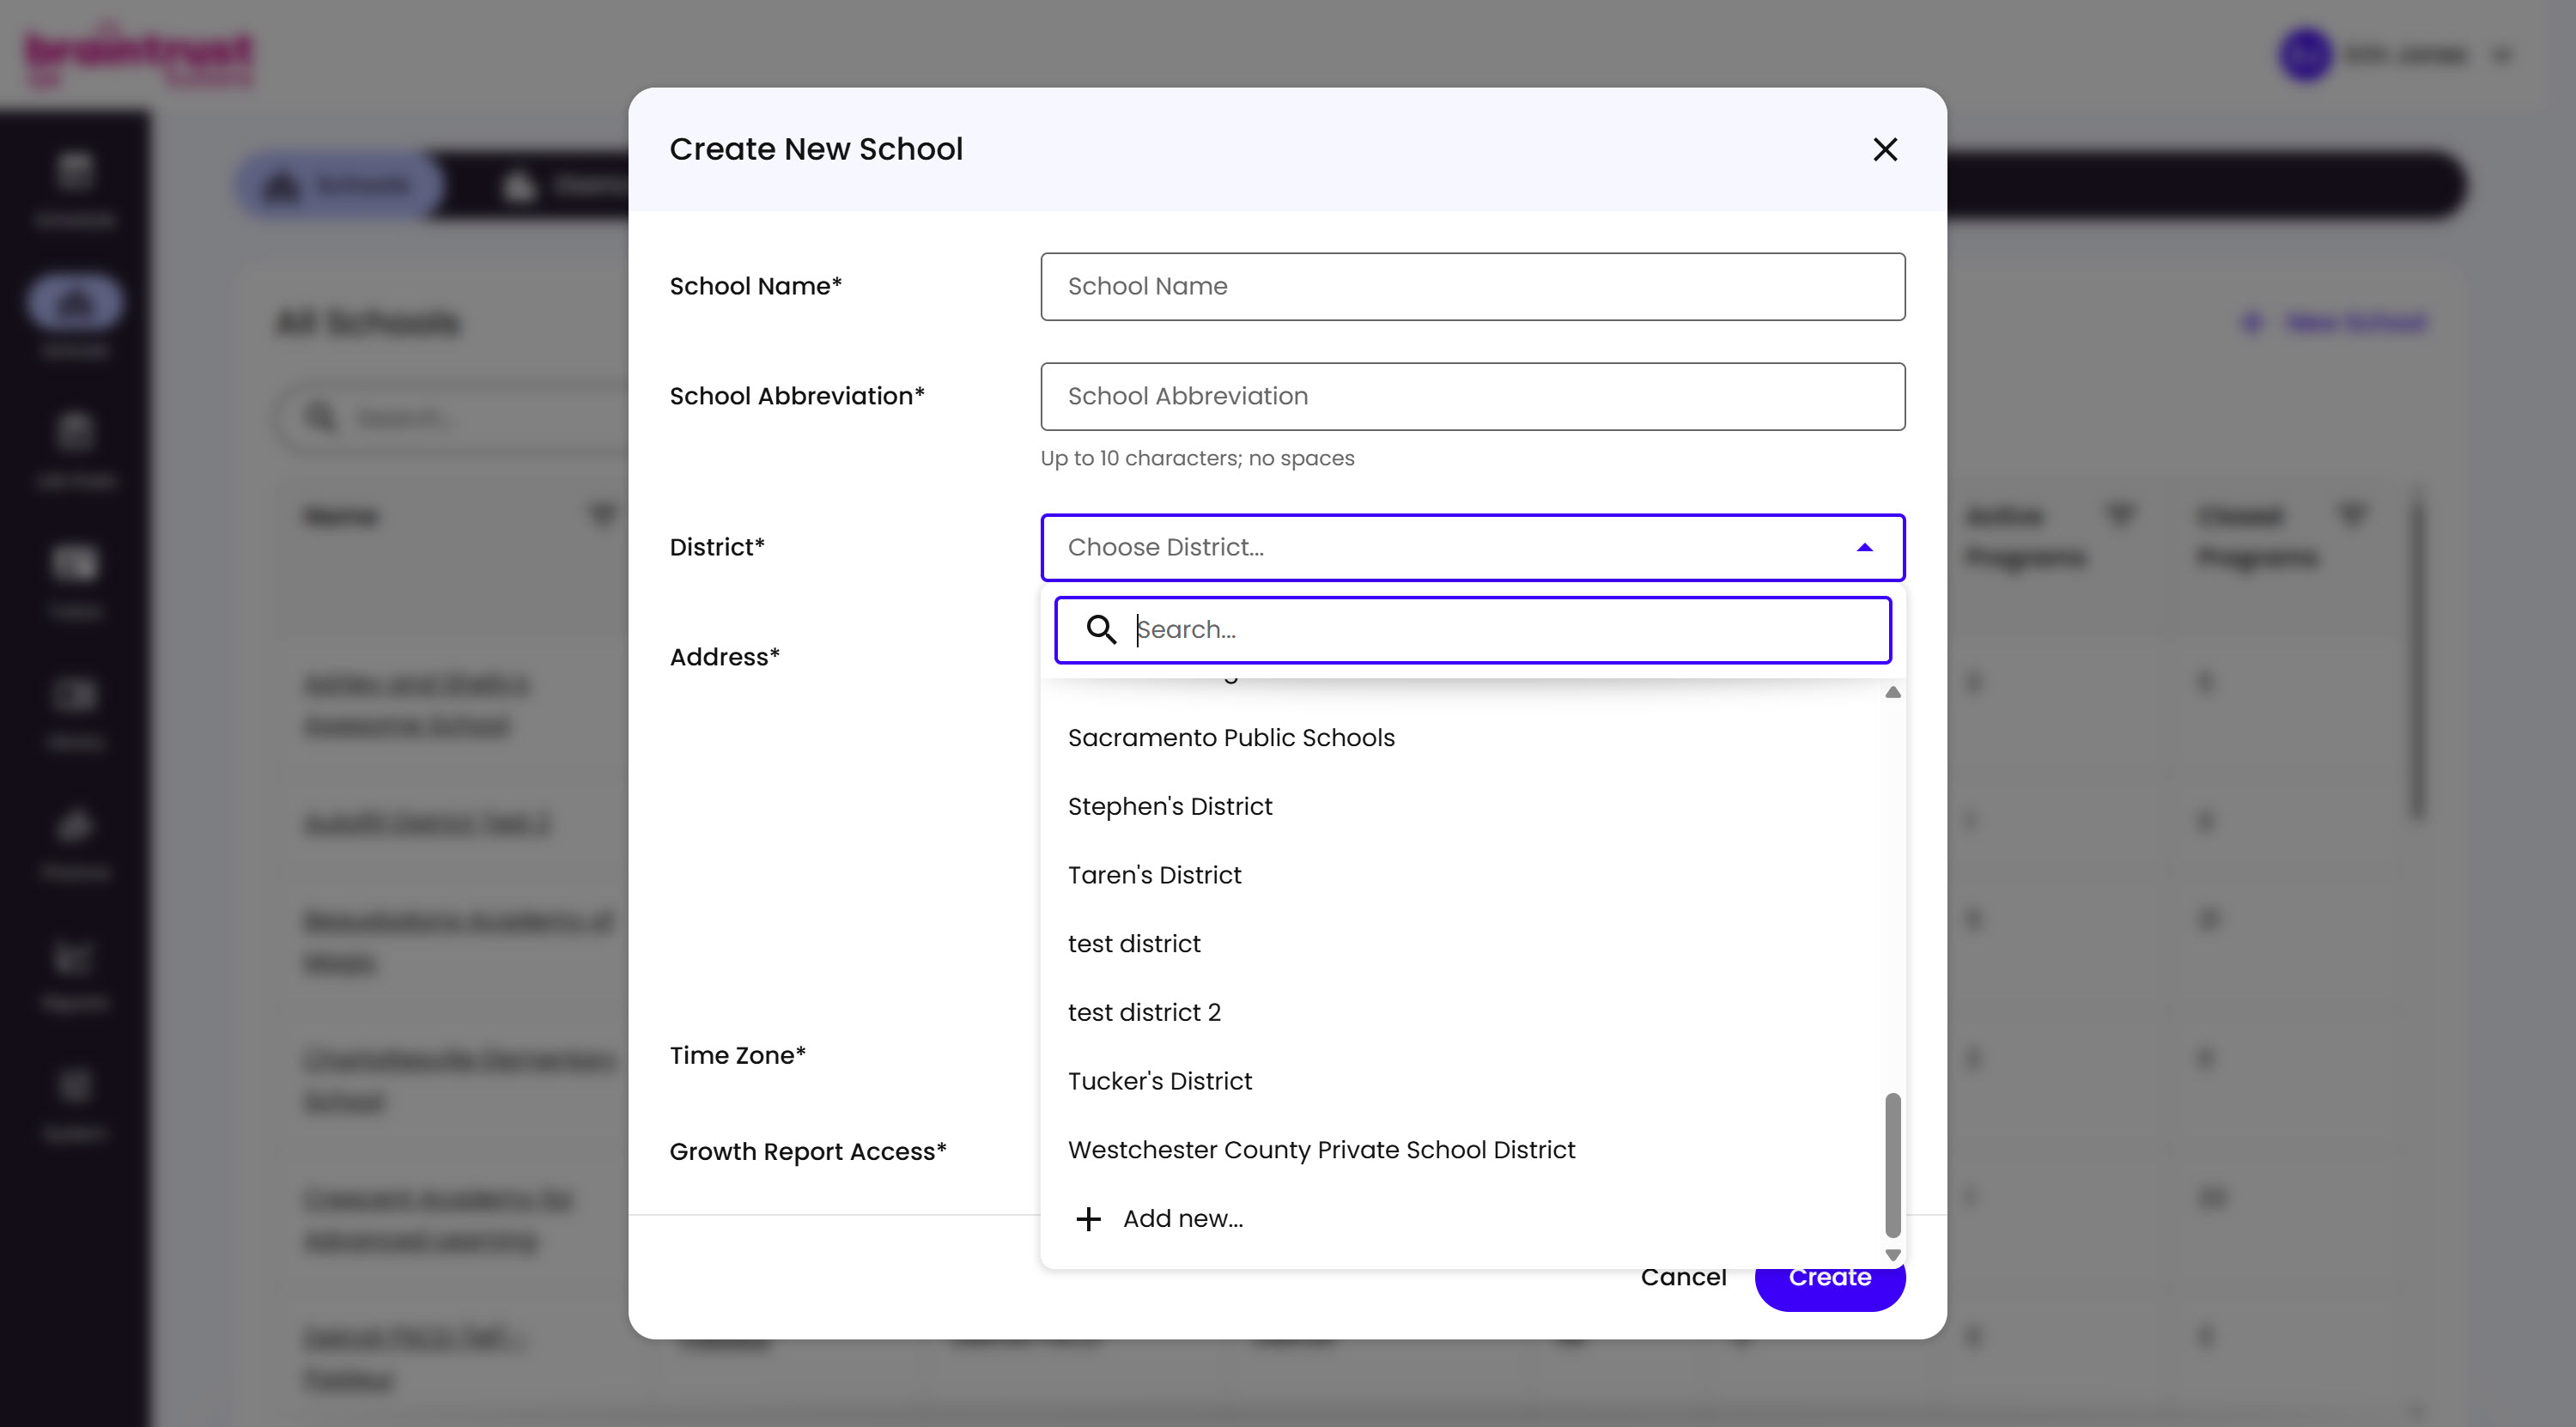
What’s on This Screen
- Search bar, for finding an existing District by name.
- District list, every District already in the platform.
- + Add new…, at the bottom of the list, opens the Create New School District modal.
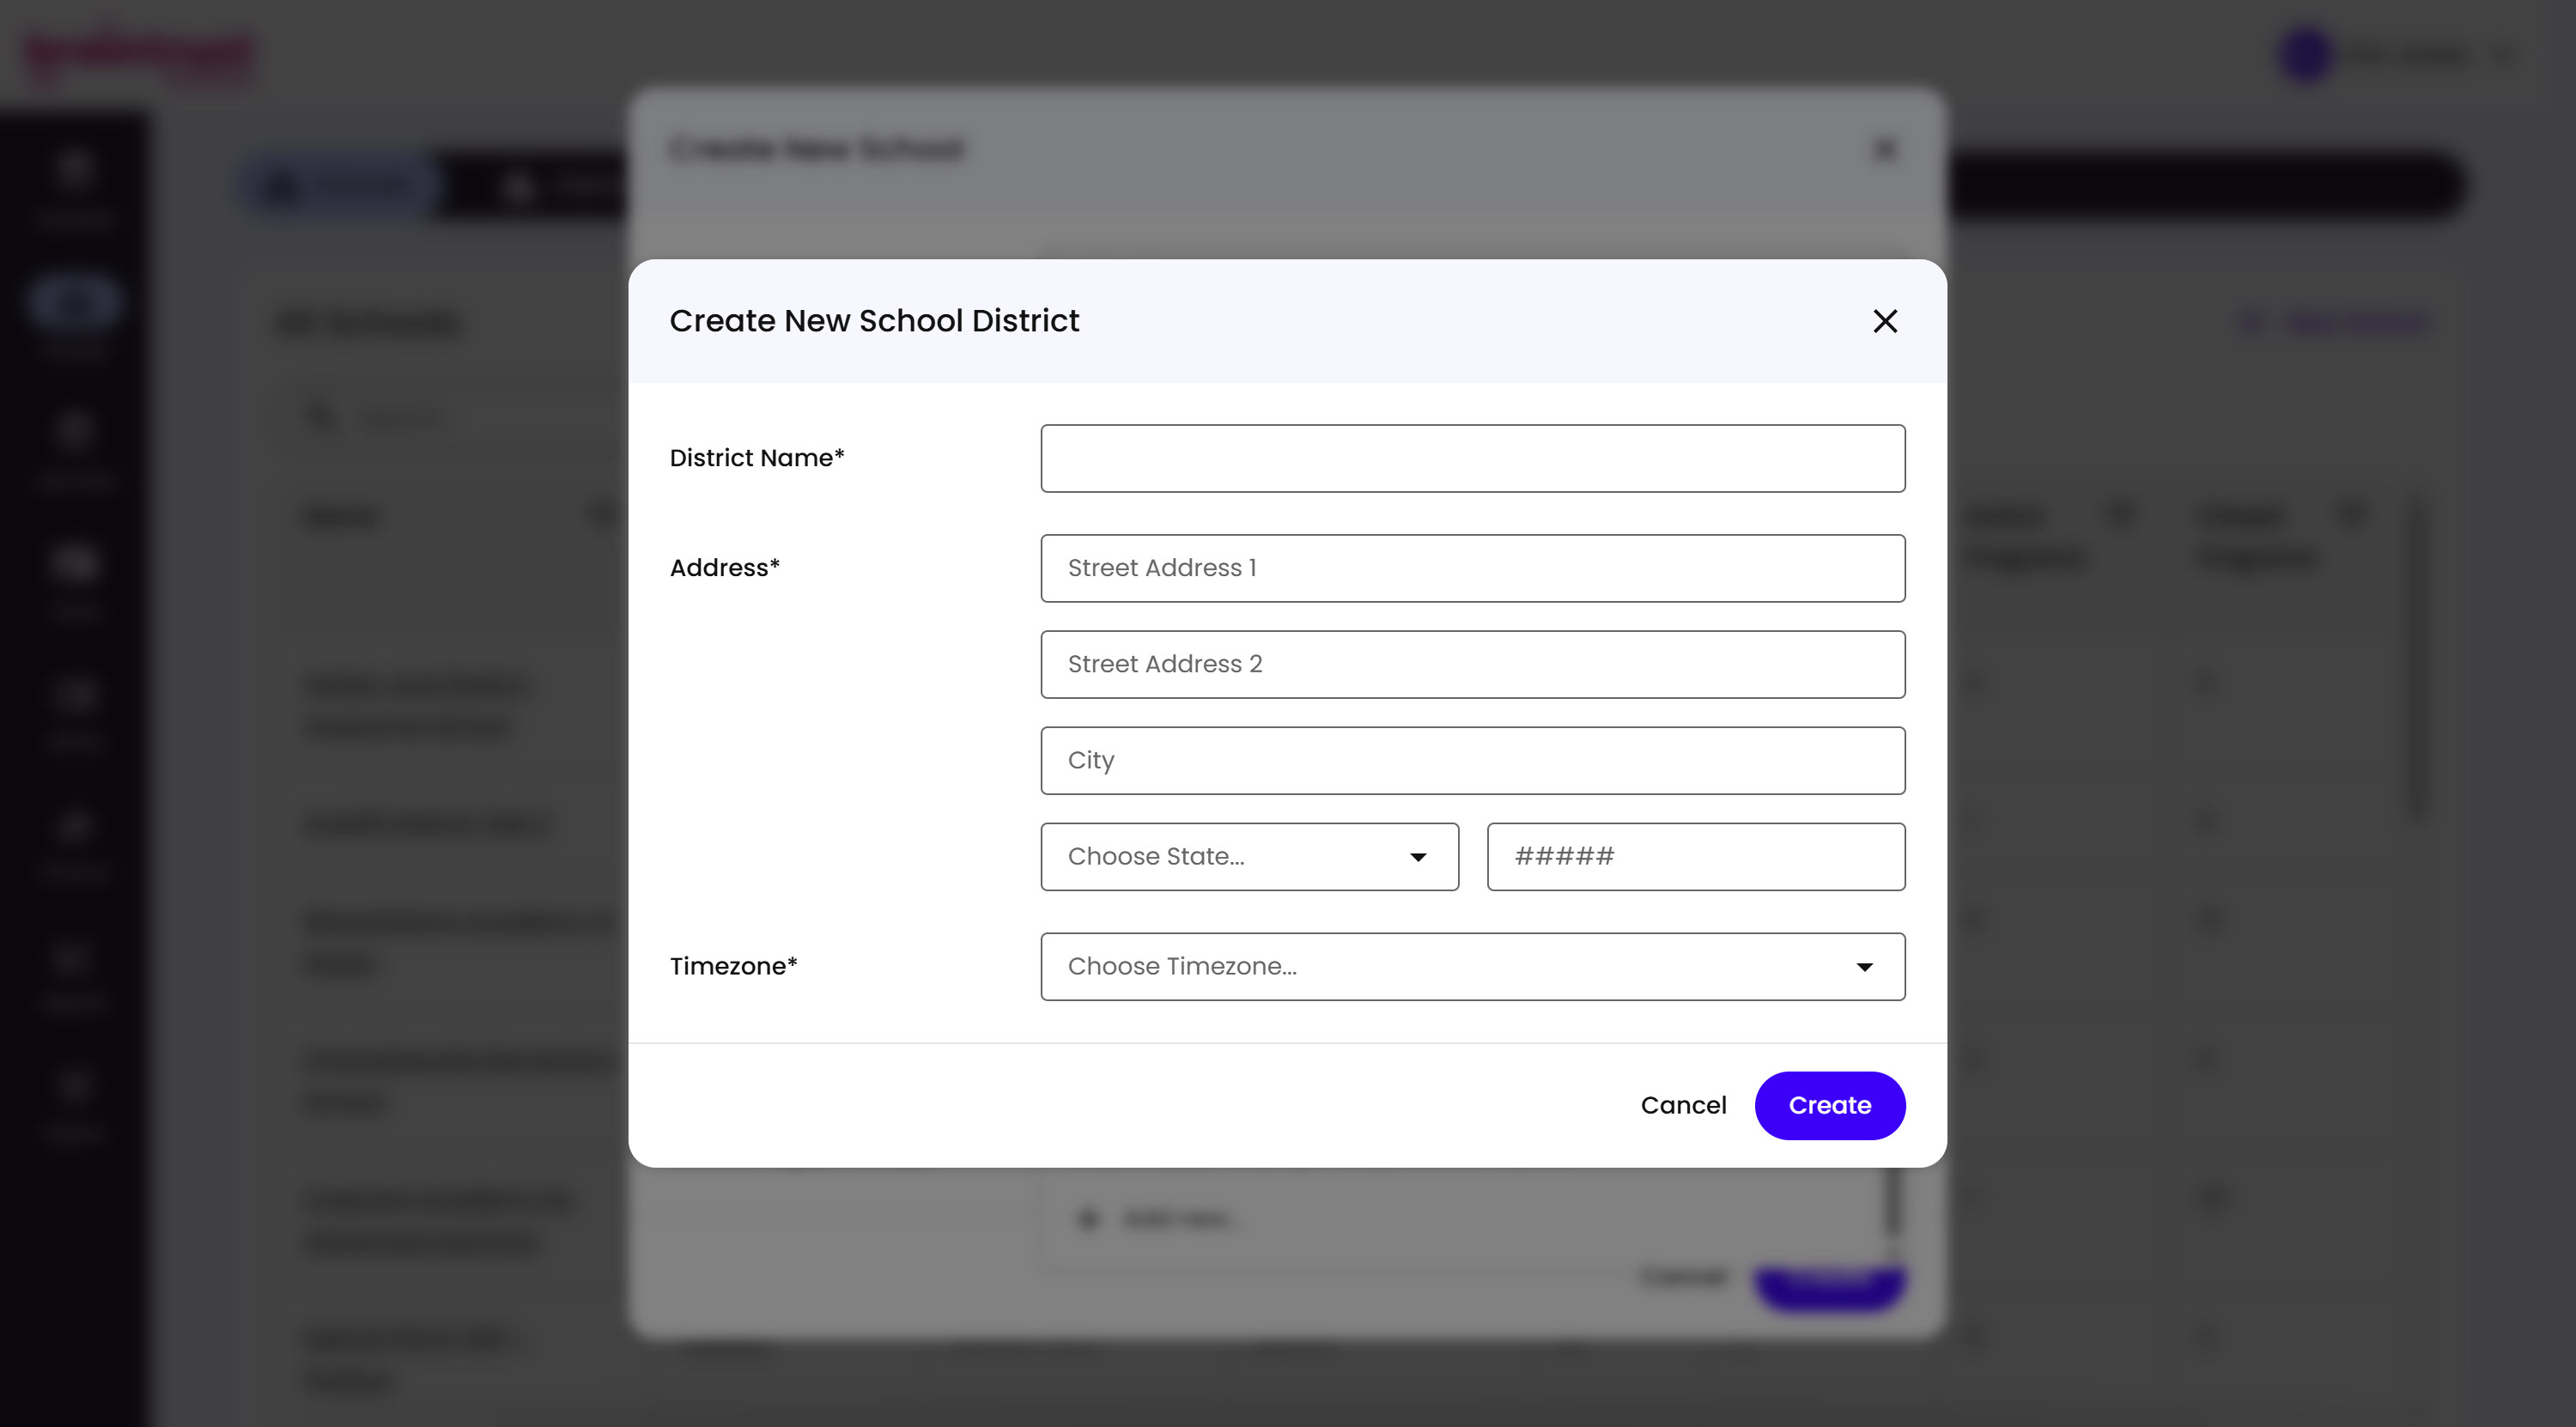
What’s on This Screen
- District Name, the new District’s name.
- Address, Street Address 1 and 2, City, State, and ZIP.
- Timezone, the District’s own time zone.
- Cancel and Create buttons, to back out or confirm - Create returns you to the Create New School modal with the District field filled in.
This is the only place School and District creation overlap - for creating a District on its own, or managing an existing one’s details, contacts, and faculty, see Creating a District next.